Note: Implemented with Dynamics 365 version 7.2.* (but likely working fine with lower or higher versions). Sample code can be downloaded at the end of this blog.
A little-known feature is the ability to log into POS with a barcode scanner or MSR. All the low-level plumbing is already implemented in POS to accept the data and to call the right RetailServer activity. Also, CRT handlers exist that carry out the mapping from the scanned/swiped data to the credential Id, which is then ultimately used to look up a user. This handler is being called as part of the authentication pipeline of the CRT.
Functional walkthrough
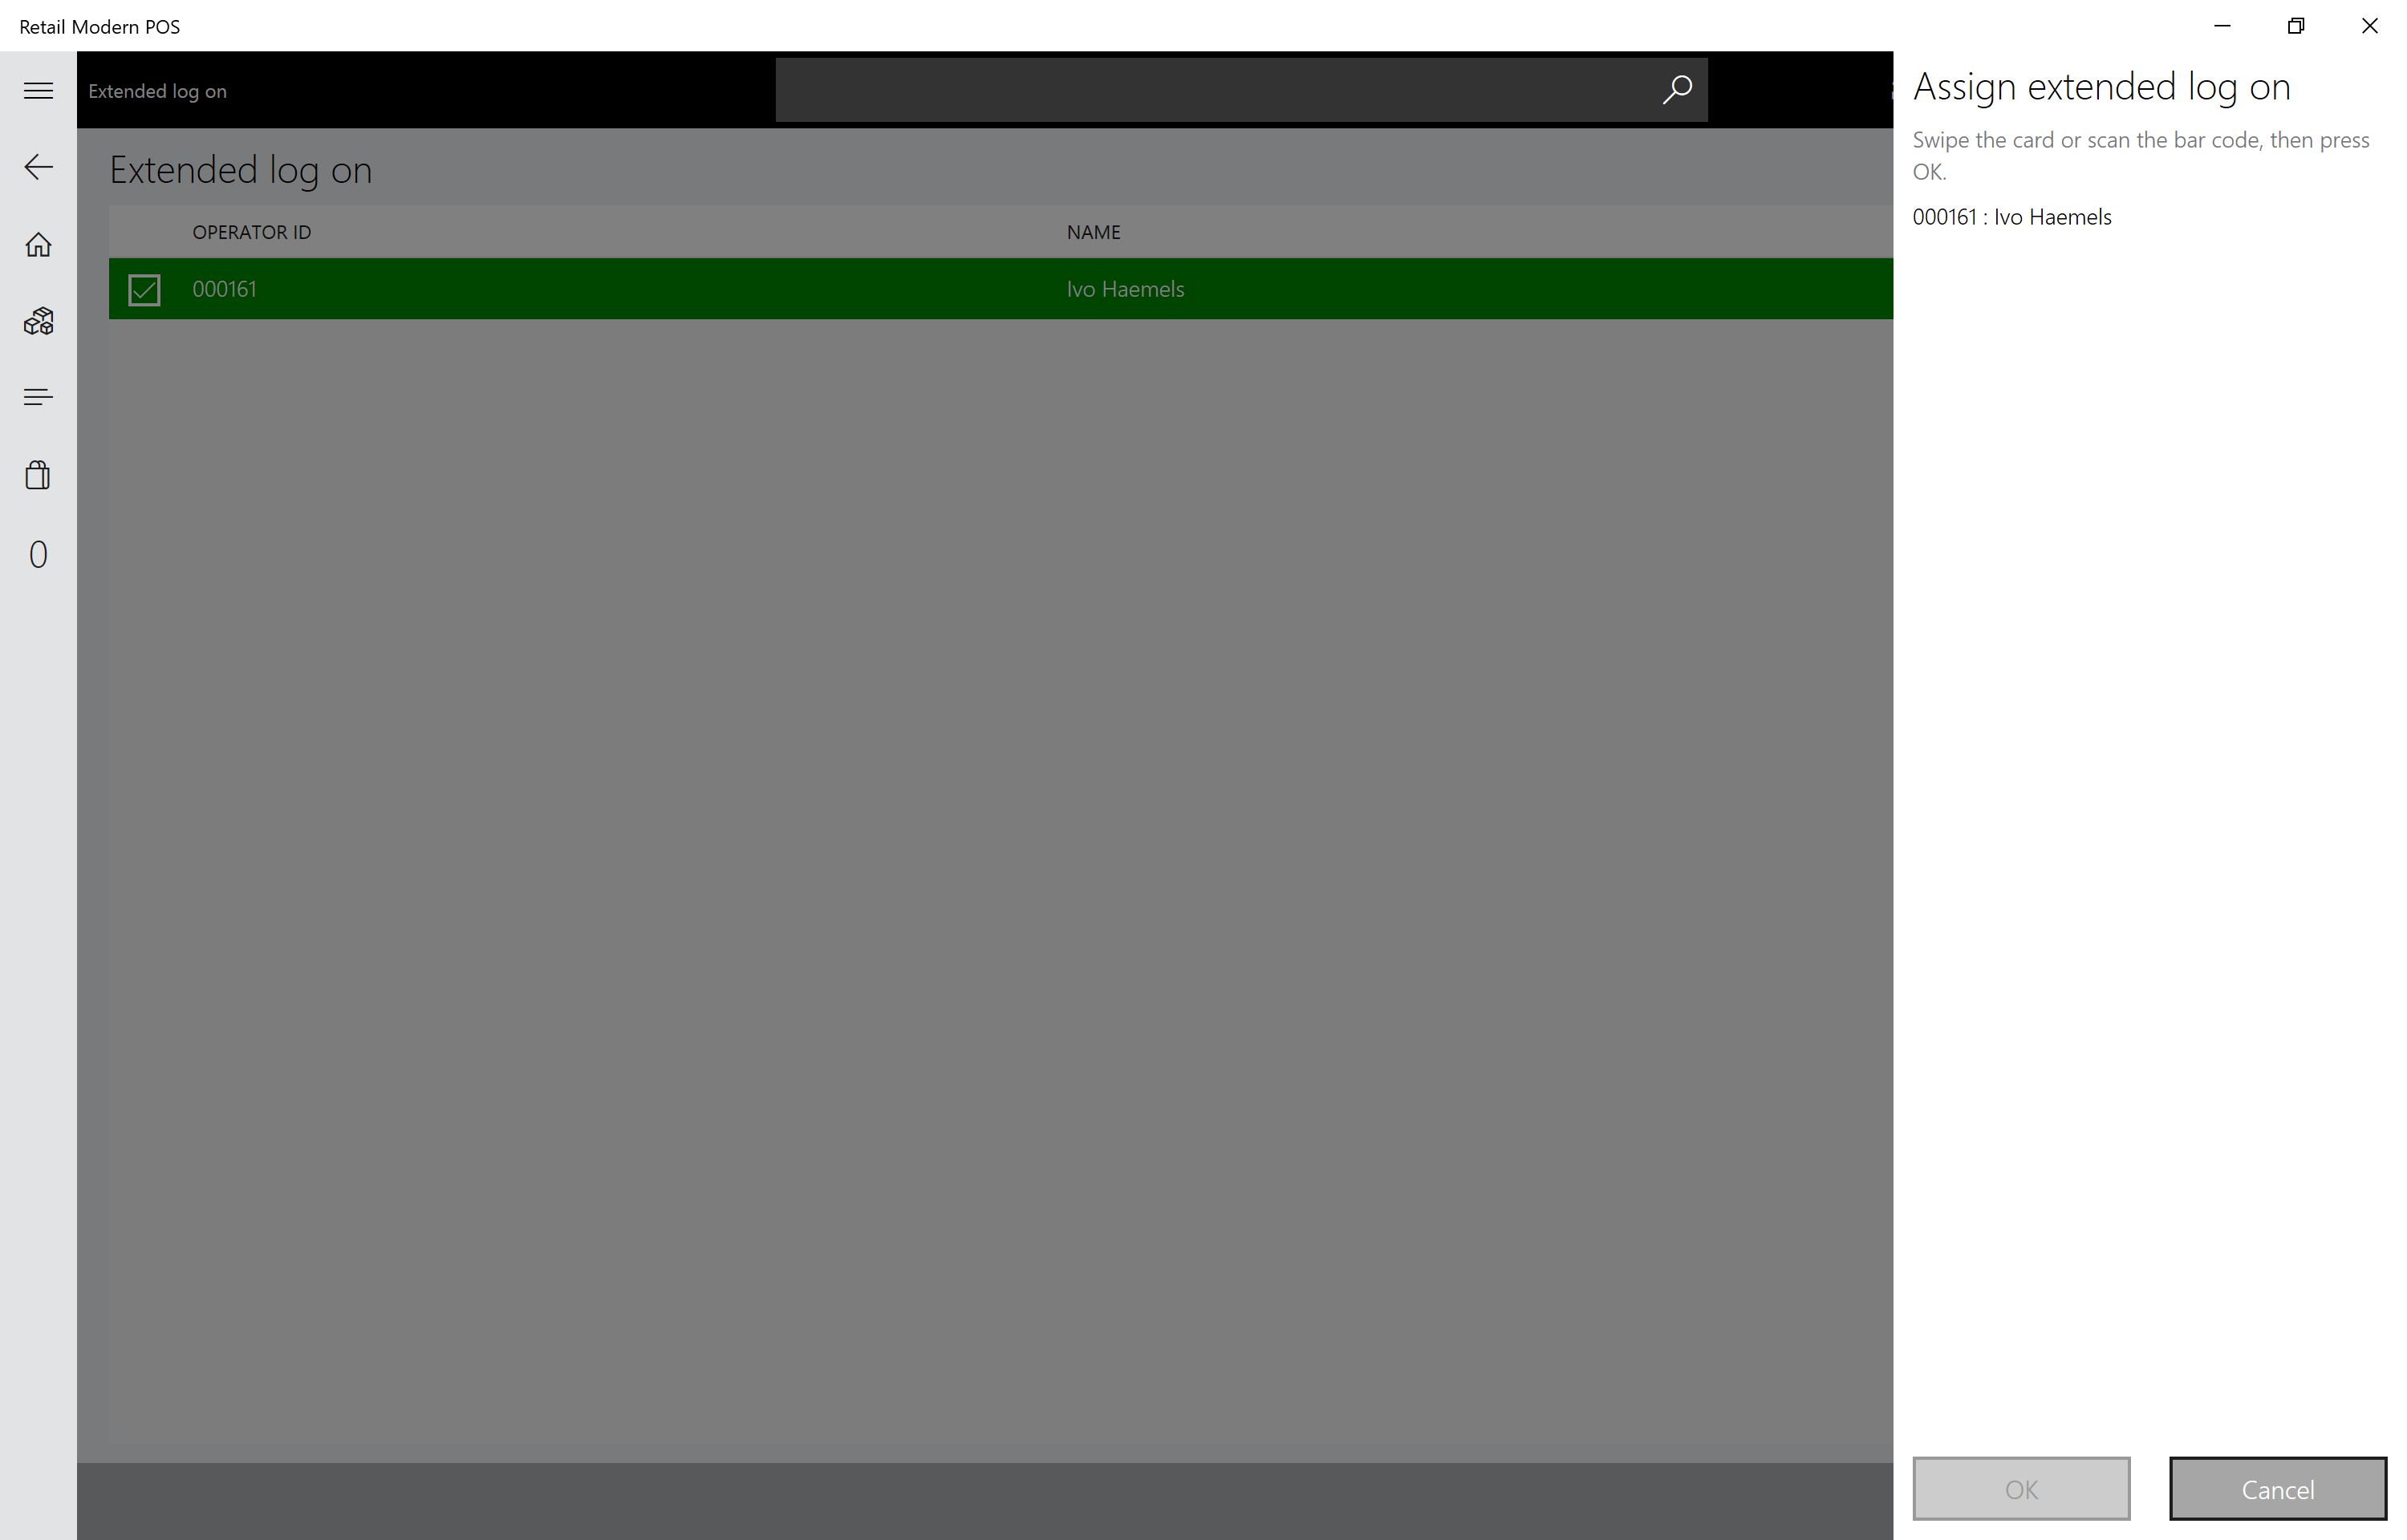
A manager must first assign a worker’s credential. For that add the operation called “Extended log on” an appropriate button layout and sync the download job that pushes the data for the registers (by default 1090). When that button is clicked, the following screen can be used to assign credential ids (insert/update):
Use the scanner or MSR when the application indicates it. Once saved, you are all set to try the login. For that, just scan/swipe on the logon dialog and the credential id is being looked up (read):
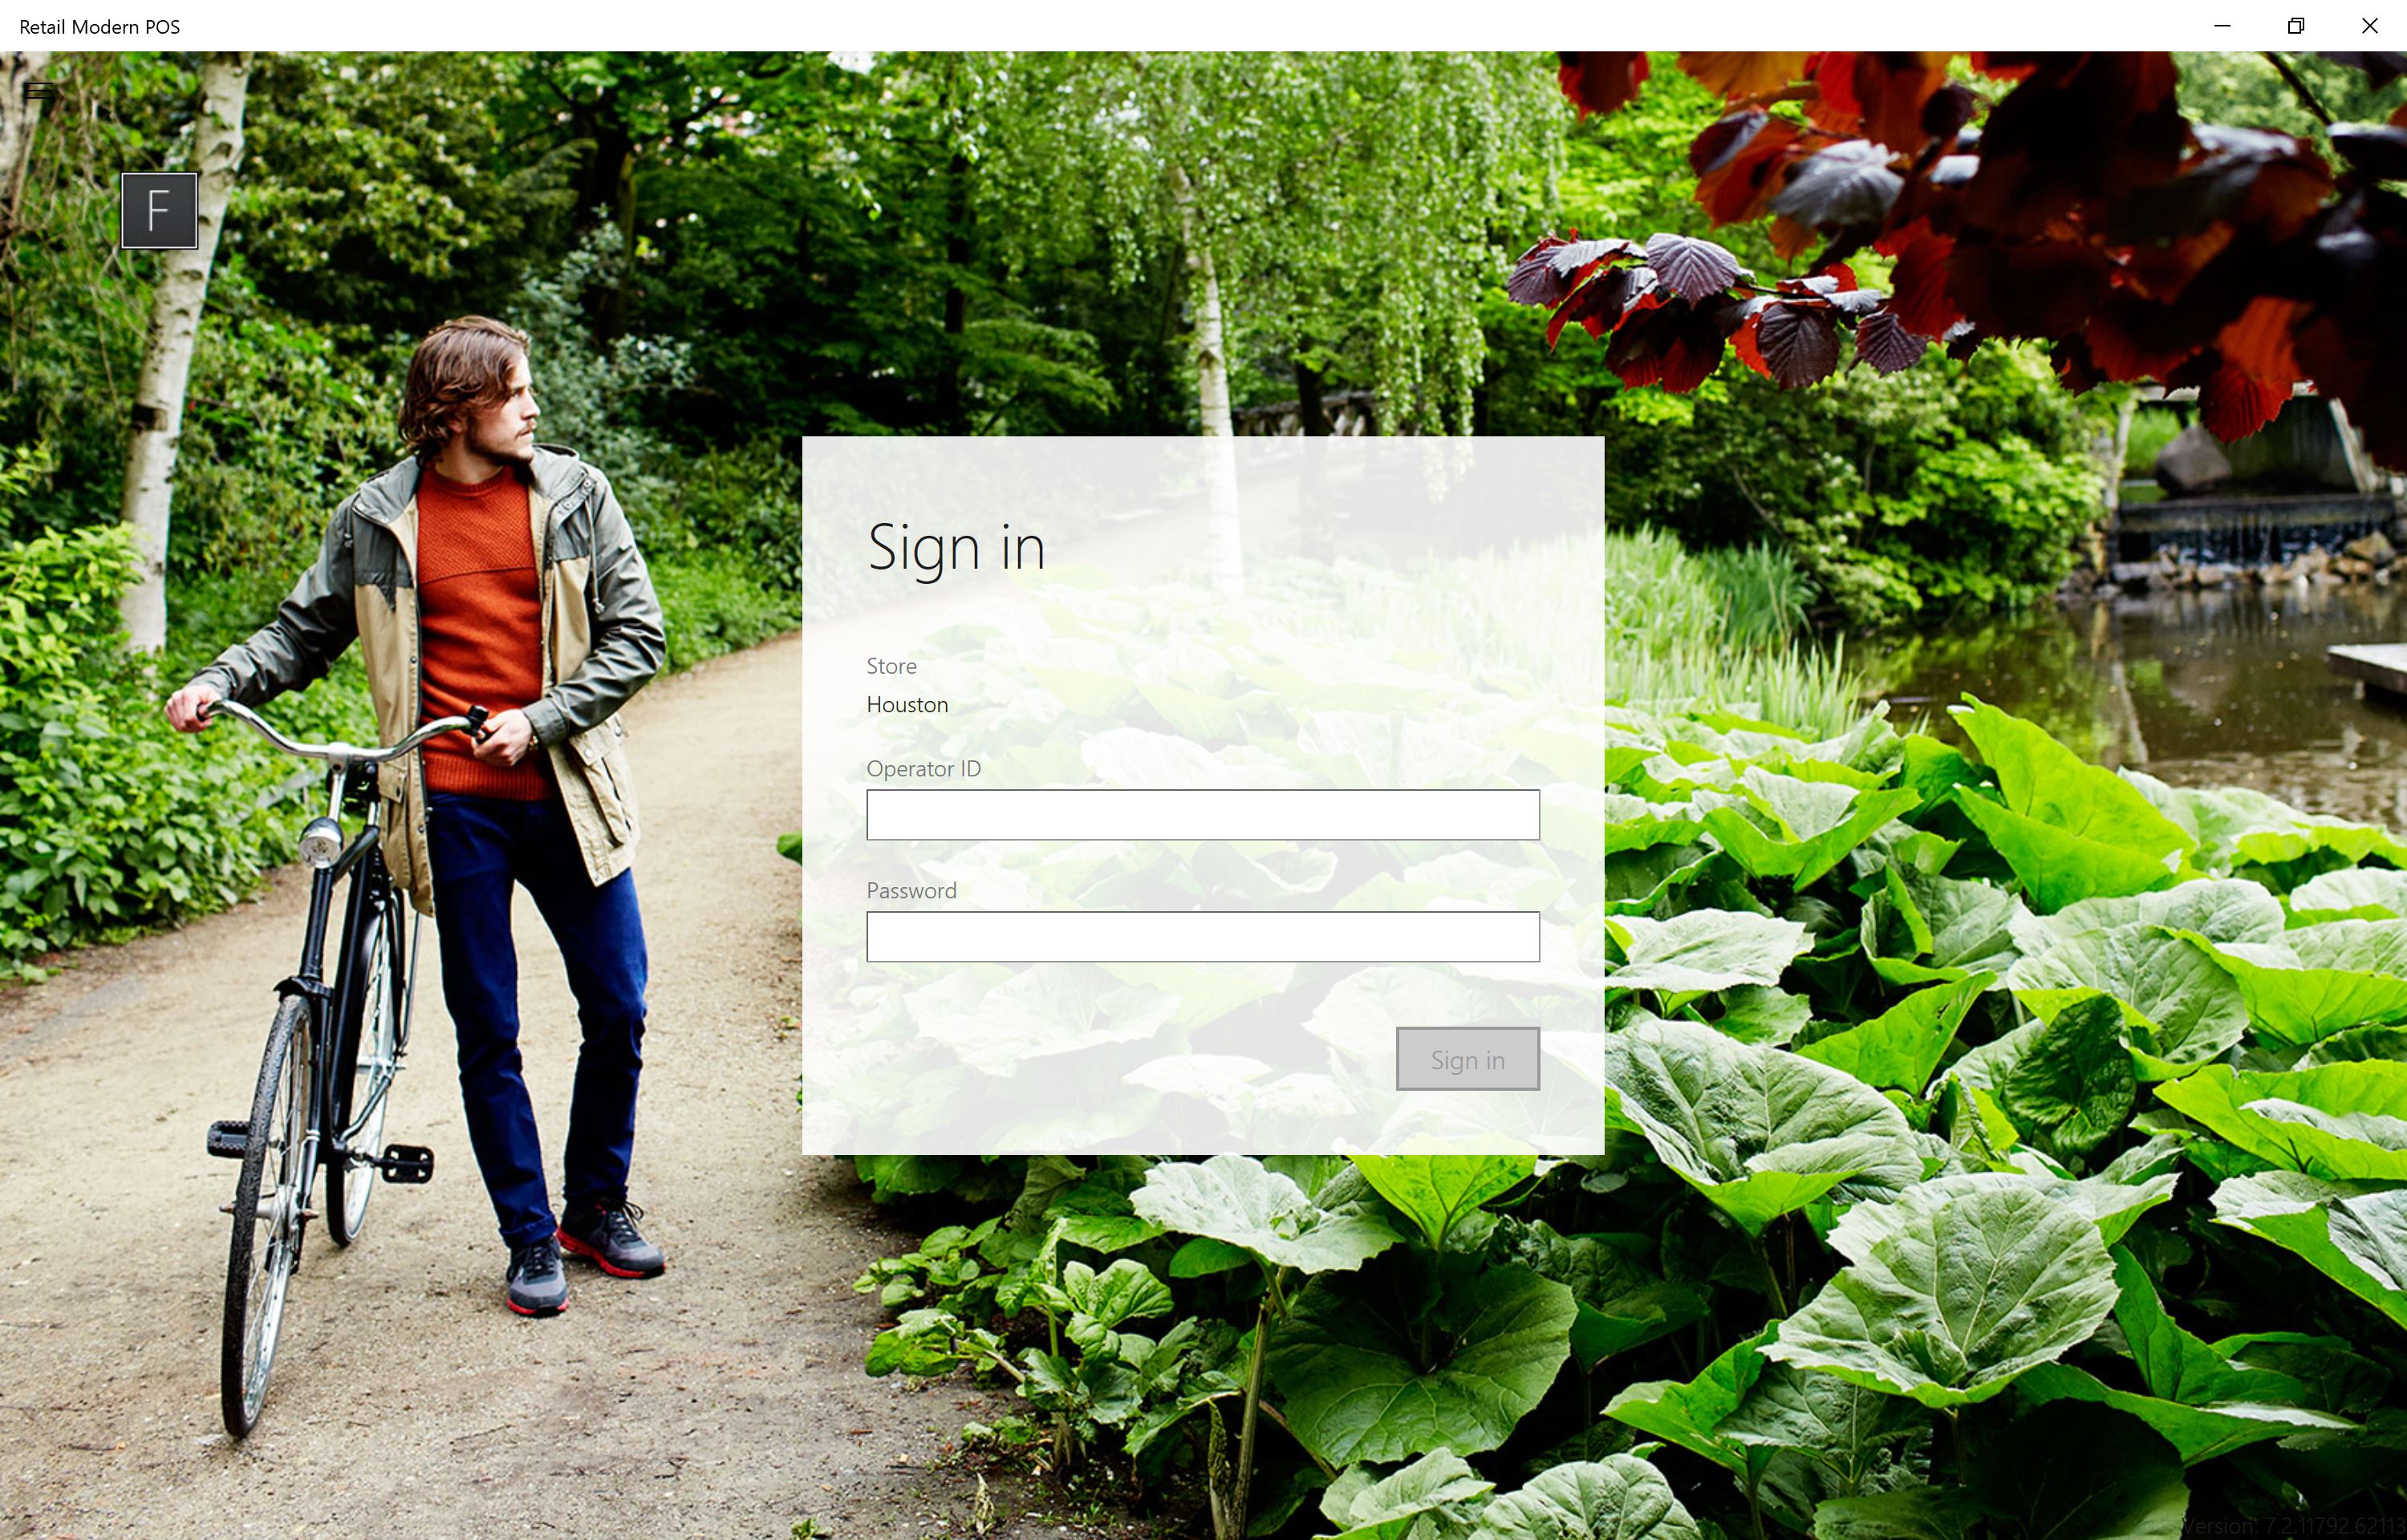
If the credential was found, the correct user will be logged in without any further prompt.
Technical details
If you want to use this functionality, you will very likely want to adjust the code that maps the scanned/swiped data to a credential id. The default implementation takes the first 5 characters and throws the rest away. What if the information in the scanned/swiped data is the same for the first 5 characters and only differs further down the string? We will need to implement our own CRT handler(s) so we can replace the mapping functions. The following example uses MSR data simulated by the Peripheral Simulator for Retail.
Note: The crt.STAFFCREDENTIALSVIEW view shows what information is stored for any staff member. The good thing is we do not need to touch any of that code, we just need to adjust the 3 CRT request handlers that need the mapping from scanned/swiped data to the credential id.
- Create a new CRT service with 3 new handlers for GetUserEnrollmentDetailsServiceRequest, ConfirmUserAuthenticationServiceRequest, and GetUserAuthenticationCredentialIdServiceRequest
namespace MyCompany.Commerce.Runtime.MyExtendedAuthService { using Microsoft.Dynamics.Commerce.Runtime; using Microsoft.Dynamics.Commerce.Runtime.Handlers; using Microsoft.Dynamics.Commerce.Runtime.Messages; using Microsoft.Dynamics.Commerce.Runtime.Services.Messages; using System; using System.Collections.Generic; using System.Globalization; public class UniqueSecretExtendedAuthenticationService : INamedRequestHandler { public IEnumerable SupportedRequestTypes { get { return new[] { typeof(GetUserEnrollmentDetailsServiceRequest), typeof(GetUserAuthenticationCredentialIdServiceRequest), typeof(ConfirmUserAuthenticationServiceRequest) }; } } public string HandlerName { get { return "auth://example.auth.contoso.com/msr"; } } public Response Execute(Request request) { if (request == null) { throw new ArgumentNullException("request"); } Response response; Type requestType = request.GetType(); if (requestType == typeof(GetUserEnrollmentDetailsServiceRequest)) { response = this.GetUserEnrollmentDetails((GetUserEnrollmentDetailsServiceRequest)request); } else if (requestType == typeof(GetUserAuthenticationCredentialIdServiceRequest)) { response = this.GetUserAuthenticationCredentialId((GetUserAuthenticationCredentialIdServiceRequest)request); } else if (requestType == typeof(ConfirmUserAuthenticationServiceRequest)) { response = this.ConfirmUserAuthentication((ConfirmUserAuthenticationServiceRequest)request); } else { throw new NotSupportedException(string.Format(CultureInfo.InvariantCulture, "Request '{0}' is not supported.", request)); } return response; } private GetUserAuthenticationCredentialIdServiceResponse GetUserAuthenticationCredentialId(GetUserAuthenticationCredentialIdServiceRequest request) { return this.GetUserAuthenticationCredentialId(request.Credential, request.RequestContext); } private GetUserAuthenticationCredentialIdServiceResponse GetUserAuthenticationCredentialId(string credential, RequestContext requestContext) { // TODO: this is the place where you can customize the mapping between what was scanned/swiped and what the credential id is in the StaffCredentialsview string credentialId = credential; return new GetUserAuthenticationCredentialIdServiceResponse(credentialId); } private GetUserEnrollmentDetailsServiceResponse GetUserEnrollmentDetails(GetUserEnrollmentDetailsServiceRequest request) { string credentialId = this.GetUserAuthenticationCredentialId(request.Credential, request.RequestContext).CredentialId; return new GetUserEnrollmentDetailsServiceResponse(credentialId, string.Empty); } private Response ConfirmUserAuthentication(ConfirmUserAuthenticationServiceRequest request) { return new NullResponse(); } } } - Put the class into a project and update the C# project file so it can be built by the Retail sdk (imports at top and bottom)
- drop the dll into your RetailServer bin\ext folder (for testing only)
- update your RetailServer bin\ext\commerceruntime.ext.config file to include the new assembly

- Update your Customizations.settings file to include this file as part of your customizations


Note: The changes in Customization.settings and commerceruntime.exe.config need to be made in the RetailSdk under VSTS, so these changes will be used by the build and package generation.
A fully working zipped up project can be found below. Just add the project to the SampleExtensions\CommerceRuntime folder and compile.
Extensions.MyExtendedAuthService