Overview
There are a few wikis at https://docs.microsoft.com/en-us/dynamics365/unified-operations/dev-itpro/index?toc=dynamics365/unified-operations/fin-and-ops/toc.json which help with specific dev ALM and deployment topics. I found myself and from questions of others that it is difficult to pull all this information together into a single process. This write-up hopefully helps somebody that wants to update to follow the process without errors. It will certainly help me next time I need to take a hotfix since I can just follow a simple cheat sheet. So lets get started.
There are 3 different update types. 1) A platform update is fully backwards compatible with the application, its of binary nature, and it can simply be deployed. 2) A X++ application hotfix ships fixes in X++ source code that can be integrated into ones own code (code merged), sort of like a customization. And finally, 3) a binary hotfix is an application update for other tools, binaries, and Retail source code. The latter is cumulative, so you will always get the latest. For that reason, use a good naming convention for the packages you download (and upload to the Asset library) as this helps later when you need to bring multiple environments to the same hotfix level.
Recommended (best) practices:
-
- Download to and upload from the cloud development box. That way these files get transferred much faster and your intranet is not used.
- If you have multiple development boxes, the steps below should be taken by one. Once all looks good, the other development boxes should get the changes via syncing VSTS (not via deployable package).
- Some binary hotfixes depend on X++ hotfixes. Deploy these first (either by deployable package or VSTS), then tackle the binary update.
- The LCS Asset library has a feature that allows for package merging. If you use it, you can decrease the overall deployment time. Unfortunately, merging does not work if the
- Retail combined package is involved. Merging X++ deployable package, binary hotfix works.
- Installed platform version, X++ hotfix (KB number) and binary hotfix (build version) can be inquired on the LCS detailed version info. See here for details.
- There is no easy way to infer the KB number of a binary hotfix from the build version. One thing to deal with this is to include build version and download date into the package name. Then you can tell with high likelihood that a KB that is older then the binary package date is included. A KB with a newer date is likely not included in the package.
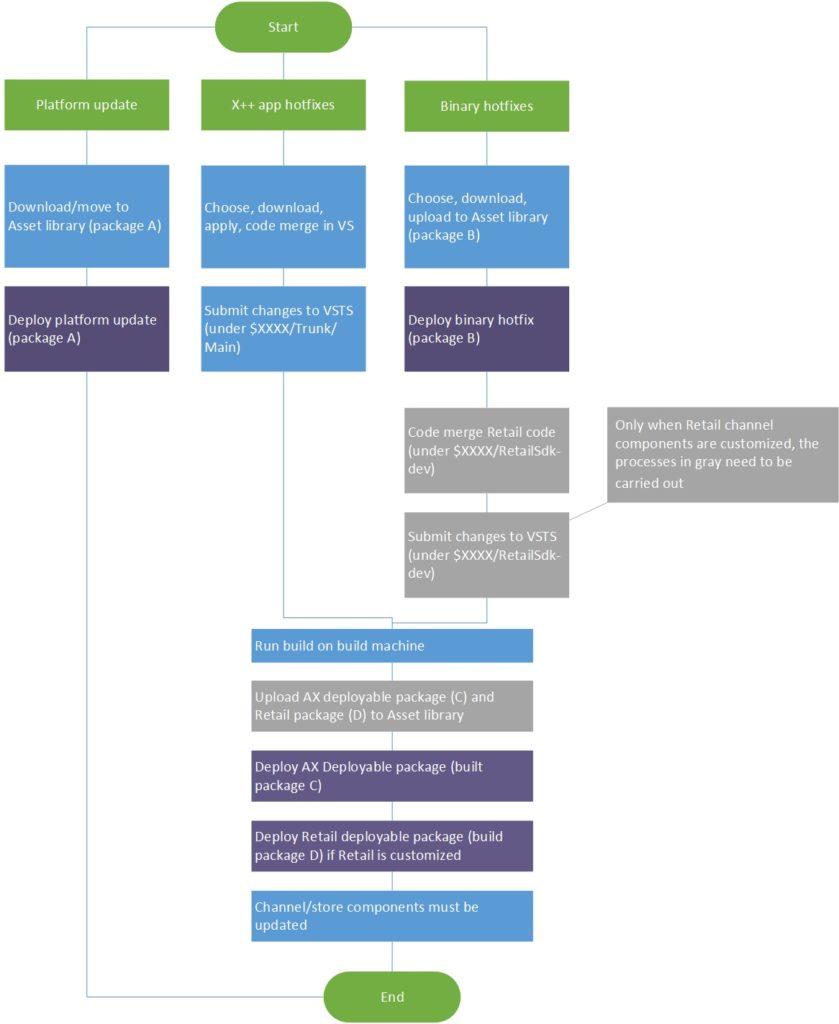
See the picture below to see an overall flow of the process. Refer to it while reviewing the following sections.
Note, that there are 4 total different deployment packages that could be deployed (purple boxes). See the details below how to get them.
Note: For the following steps, the integration of the Retail Sdk’s build with the Dynamics 365 for Operations build is assumed. If you do not have this setup, follow Retail Sdk and Dynamics 365 build definition.Platform updates
Platform updates are the easiest. There is no code merge required, not VSTS needed, you just move it to the Asset library and deploy it. See more information at FAQ monthly platform updates.
X++ application hotfixes
X++ hotfixes are not cumulative, so there may be some code merging needed, if you pick multiple. Visual Studio and the Dynamics Operations VS addin will help with that.
Download the hotfix
Ideally, you pick the hotfix you need and be done with it. However, I have found it to be better in the long run to take all hotfixes. It incurs slightly more testing up-front, but less testing when updating to the next major version. Additionally, other fixed issues you may just not have not encountered will get fixed before you see them.
-
- Logon to LCS on the development box, chose the right environment and hit the X++ hotfix tile
- Select All and hit Add button
- Download package
- Select all and download
- Name it with meaningful data so you can identify the package later. I use environment name, date of download, the fact that this is not a binary update but an X++ update etc. (i.e. NewX++HotfixesForSpringEnv170903)
- Unblock and unzip the package
Backup PackageLocalDirectory
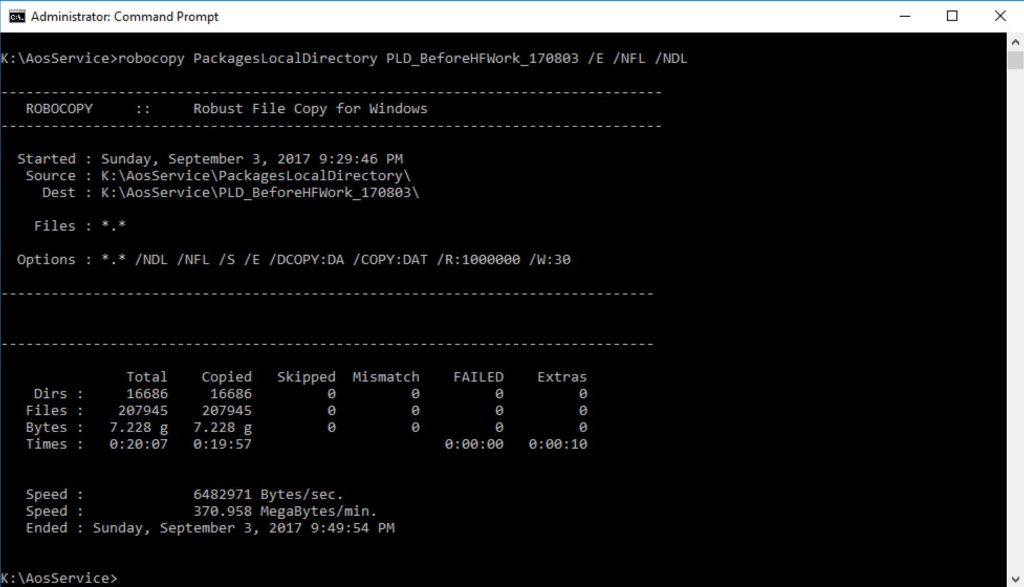
I got burned by a failed hotfix application after my dev box became corrupted. I could not tell for sure which files had been touched… Since then, I do a simple robocopy-backup to be able to rollback if something happens.
- Open a cmd.exe window with elevated privileges (runas admin)
- Change directory into the parent of your PackagesLocalDirectory folder (here K:\AosService, might be in J: also)
- robocopy PackagesLocalDirectory PLD_BeforeHFWork_170803 /E /NFL /NDL
Prepare VSTS for the X++ hotfixes
I have had issues with the VS addin in the past, so I always use the command line version. Additionally, it is important to understand the –prepare statement. Use it! Otherwise, code merges you may need to do later will be hard.
Update:
Below is a batch script that I add to each Metadata folder (VSTS too). Just update the environment variables, and remove the commented lines one by one, first -prepare, then -install. See below for details. here is the contents of the script:setlocal set HotfixPackageBundlePath=C:\Temp\Downloads\AllX++HotfixesTill06192018\HotfixPackageBundle.axscdppkg set PLD=k:\AosService\PackagesLocalDirectory set TFSUri=https://xxxx.visualstudio.com/defaultcollection rem bin\SCDPBundleInstall.exe -prepare -packagepath=%HotfixPackageBundlePath% -metadatastorepath=%PLD% -tfsworkspacepath=%PLD% -tfsprojecturi=%TFSUri% rem bin\SCDPBundleInstall.exe -install -packagepath=%HotfixPackageBundlePath% -metadatastorepath=%PLD% -tfsworkspacepath=%PLD% -tfsprojecturi=%TFSUri% endlocal
Save it with a name like UpdateAppHotfixes.cmd. Run it from an elevated cmd console, while the local directory is the PackagesLocalDirectory.
-
-
- Open Visual Studio and make sure you are logged in with the same account that is going to be used to access VSTS. If you are not sure, logout and log back in. All we want to get is a new valid authentication token so the steps below will succeed.
- Close all VS instances
- Open a cmd.exe window with elevated privileges (runas admin)
- Change directory into PackagesLocalDirectory\bin folder (here K:\AosService\PackagesLocalDirectory\Bin, might be in J: also)
- SCDPBundleInstall.exe -prepare -packagepath=C:\Temp\Downloads\NewX++HotfixesForSpringEnv170903\HotfixPackageBundle.axscdppkg -metadatastorepath=k:\AosService\PackagesLocalDirectory -tfsworkspacepath=k:\AosService\PackagesLocalDirectory -tfsprojecturi=https://XXXXX.visualstudio.com/defaultcollection
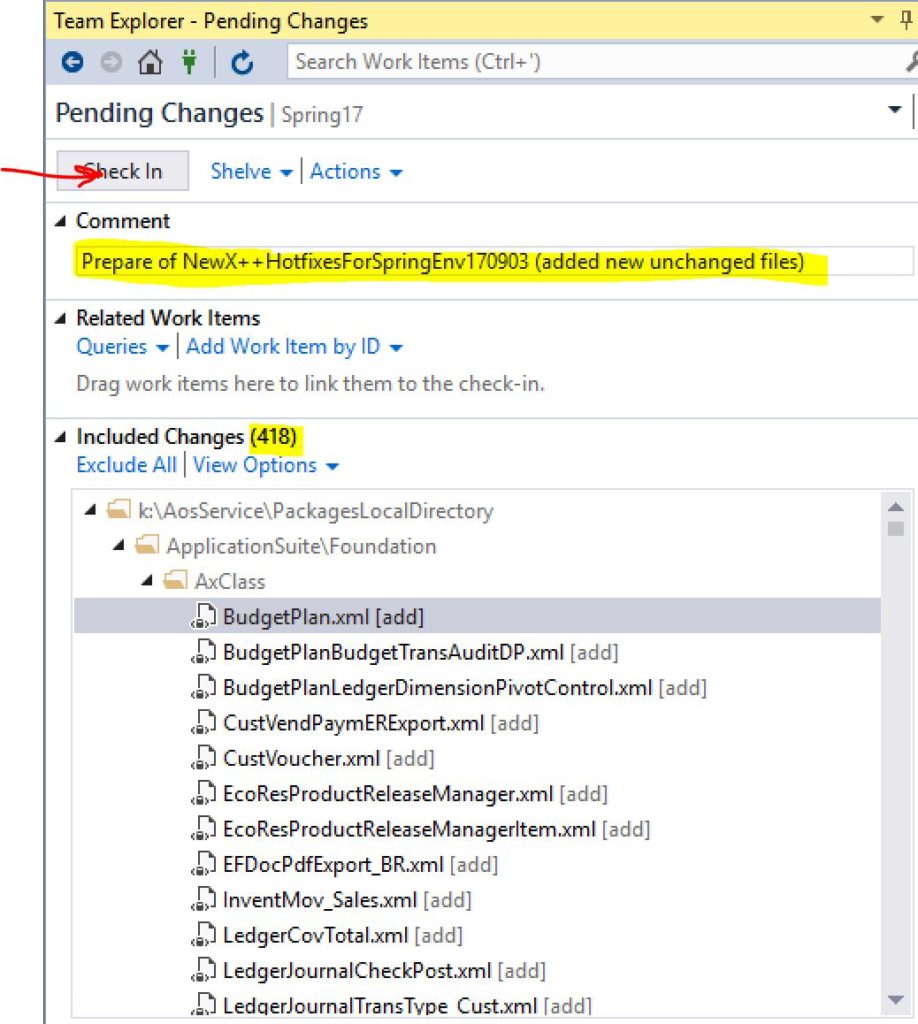
- Once the command finished, open Visual Studio and submit the newly added files with a meaningful changelist name
Apply the hotfixes
This step will apply the actual changes to the files that were prepared in the previous step.
-
- close all VS instances and keep using same cmd.exe instance from above
- SCDPBundleInstall.exe -install -packagepath=C:\Temp\Downloads\NewX++HotfixesForSpringEnv170903\HotfixPackageBundle.axscdppkg -metadatastorepath=k:\AosService\PackagesLocalDirectory -tfsworkspacepath=k:\AosService\PackagesLocalDirectory -tfsprojecturi=https://XXXXX.visualstudio.com/defaultcollection
- Once the command finished, check for conflicts: open Visual Studio, Select Dynamics 365/Addings/Create project from conflicts
If there are conflicts, you need to resolve them - Do a full build: Dynamics 365/Build models/Packages-select all/Options-use default plus select sync database and then hit the Build button
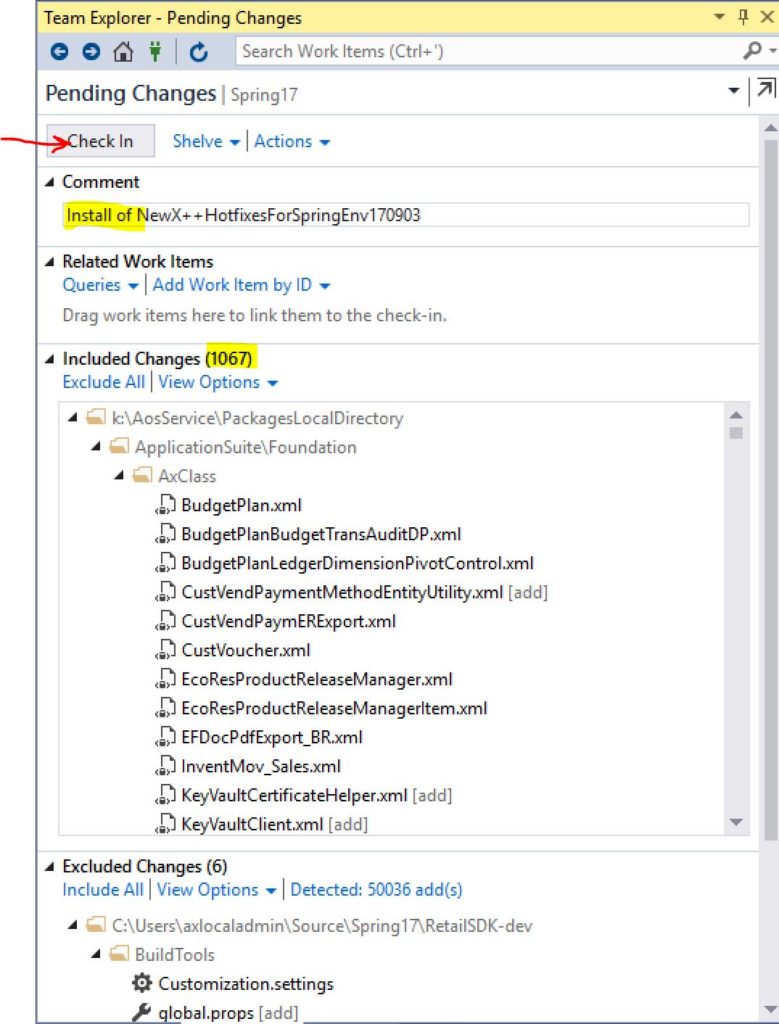
- When the build succeeded without errors, submit the changed files with a meaningful changelist name
Binary hotfixes
Binary hotfixes are cumulative. You need to pick one of them, and you will get the latest. If Retail channel components are not customized, then there is no code merge needed.
Download the binary hotfix
-
- Logon to LCS on the development box, chose the right environment
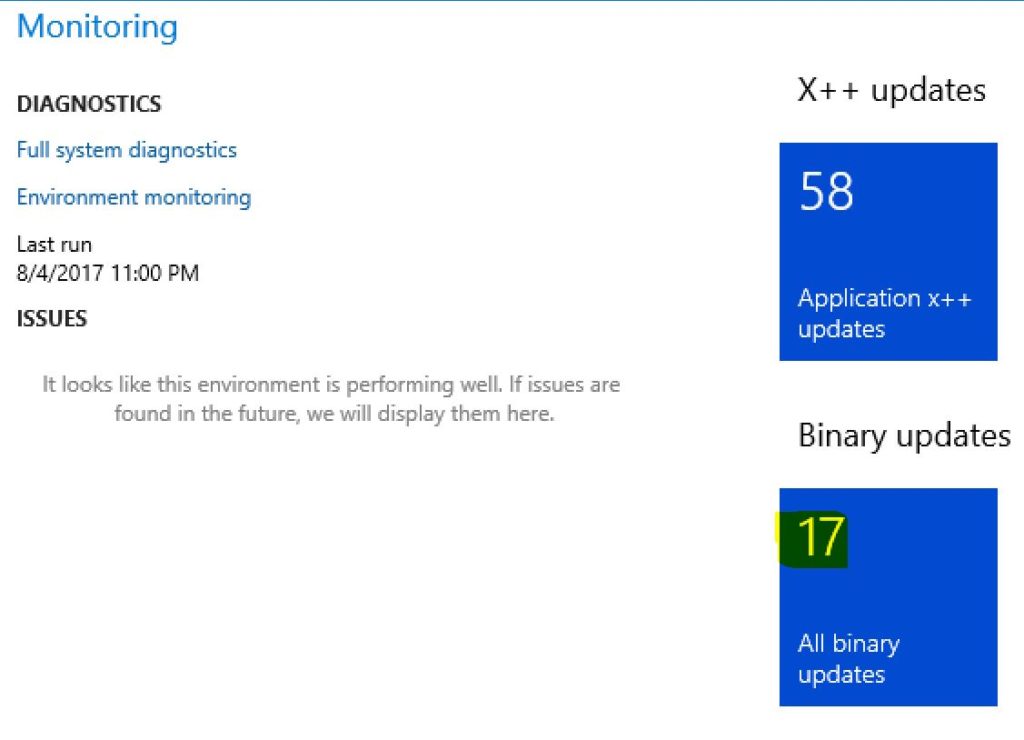
- Click the download binaries button
- Name it with meaningful data so you can identify the package later. I date of download (i.e. AllBinary72UpdatesLatestPlatform170903)
- Unblock the zip file and then unzip it
- Upload the zipped package to LCS’s Asset library
Apply the binary hotfix
Use the LCS environment’s Maintain menu to deploy this package.
Only in case of Retail channel customizations: Update the Retail Sdk mirror branch
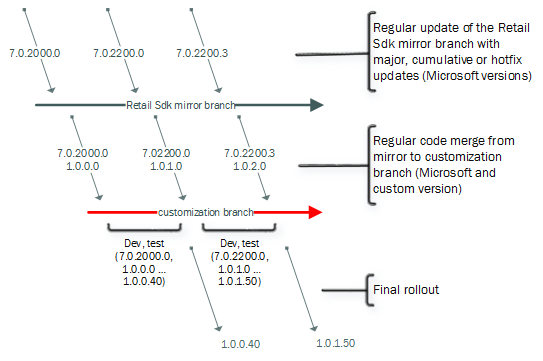
In order to effectively do code merges, it is suggested to use 2 branches. For more details, check Retail Sdk Overview (at the end of the wiki page).
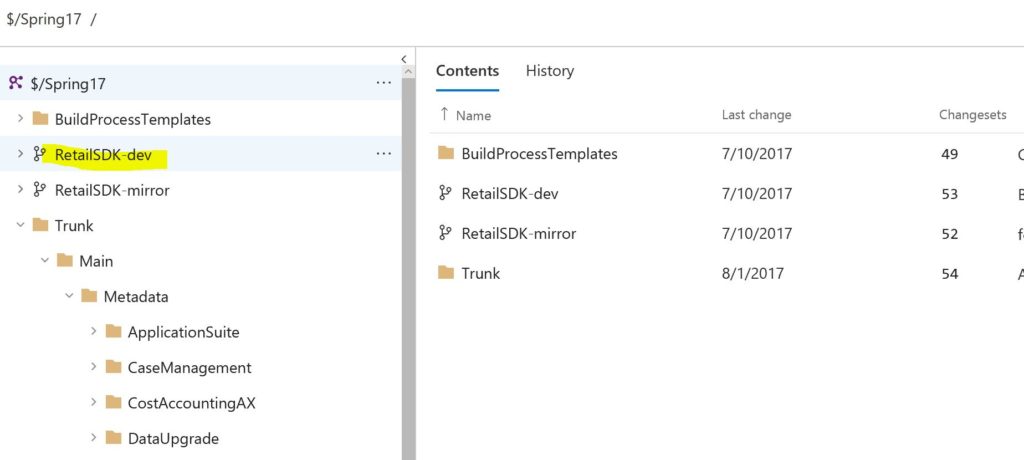
Ideally, the Retail Sdk branch would be hosted in the same VSTS project, in parallel to the Trunk folder.
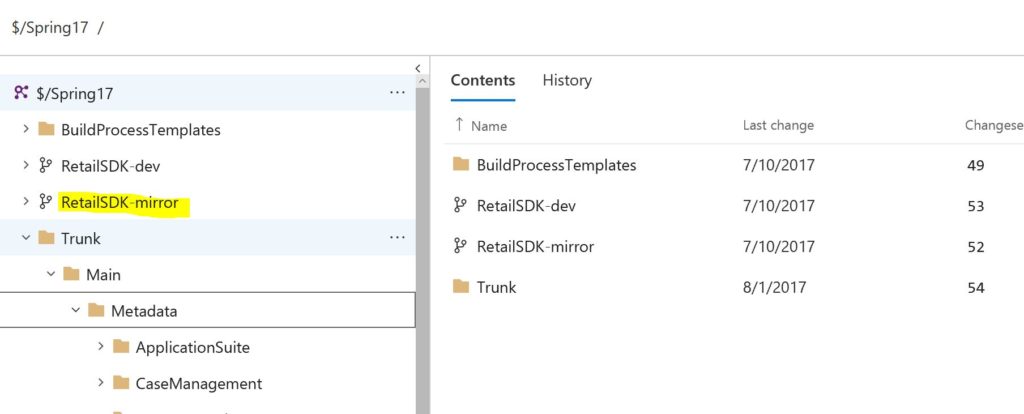
In order to update it:-
- Make sure the mirror branch/folder is fully synced to latest version.
- Close all but one Visual Studio instances
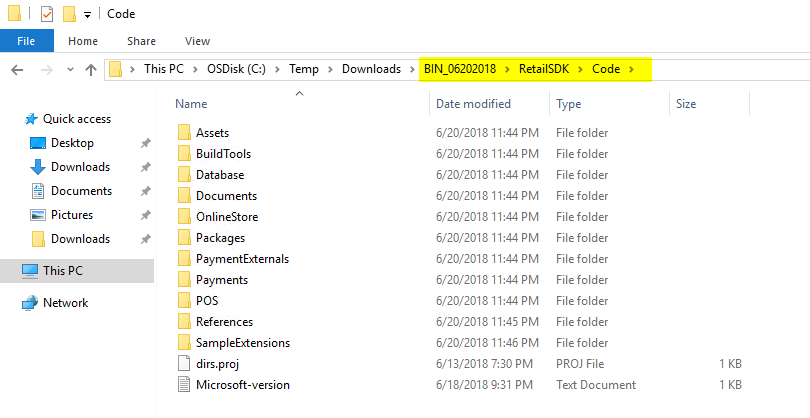
- In a first Windows Explorer window, find the new Retail Sdk which we will use to update the mirror. On a brand new environment, find it in the service drive (K:\ or J:\) under “Retail Sdk”. If this is a binary hotfix, unzip the hotfix package as you downloaded it, and find the SDK in the RetailSDK\Code folder.
- In a second Windows Explorer window open the location of the outdated mirror Retail Sdk branch/folder (where it is mapped from VSTS to local folder)
- Delete all files in the outdated mirror Retail Sdk branch/folder (open in the second Windows Explorer Window)
- Copy and paste all files from the new Retail Sdk into the folder you just cleaned (copy from second to first Windows Explorer window)
- (Optional) If you have any doubt whether the shipped Retail Sdk has a build error, carry out these steps to verify:
- (Optional) Make a temporary copy of the new Retail Sdk (from the hotfix) to any other place of your choice
- (Optional) Open a Visual Studio 2015 msbuild command prompt and change directory to the temporary location
- (Optional) Type “msbuild” and hit Enter (if this shows any build errors, please open a support request or bug as the shipped Retail Sdk should build without errors)
- Delete all files in the mirror branch in Windows explorer, and add the new Retail Sdk back. This will ensure that removed files are properly being removed from the source control.
- In “Source Control Explorer”, right click the mirror branch, “Add items to Folder…”, Add all folders from the same source location back. Make sure there are no “excluded items”, and hit Finish.
- Make sure there are no files from the mirror branch listed under “Team Explorer”, “Pending Changes”, “Excluded Changes” and “Detected”. If there are, promote them to the “Included Changes”
- Check In the changes.
Only in case of Retail channel customizations: Code merge the Retail Sdk customization branch
- Make sure you do not have any changed files in the customization branch before you start. If this is difficult to accomplish create a new client mapping, get the customization branch into a different folder or machine and do the merge there. Do not start merging if you have opened files.
- In Source Control Explorer, right click the mirror branch and select “Branching and Merge…”, Merge
- Make sure that the source is the mirror branch and destination is your customization branch
- Hit Next and Finish
- Resolve any possible merge conflicts
- Watch closely that all “Included files” are the correct files. These should only be the merged files, or updated files in the mirror
Watch closely that all “Excluded files” only include generated files. Do not promote them
Only in case of Retail channel customizations: Test local Retail Sdk customization build and submit to VSTS
Before checking in these changes, lets make sure that all builds fine. Open a Visual Studio MSBuild developer command window, and type “msbuild” at the root of the Retail Sdk customization branch. Once all builds fine, submit the changes with a meaningful changeset name.
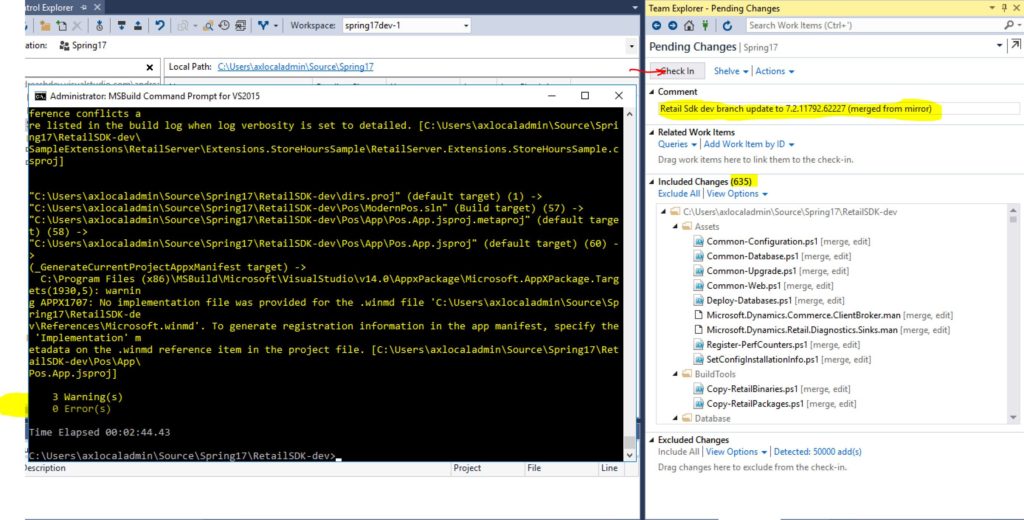
-
Run build on build machine
Inspect the submitted changes in the VSTS code branch. In the example below, I see 2 checkins for the X++ hotfixes, one other code change, one to update the Retail Sdk mirror branch and one to code merge the Retail Sdk customization branch.
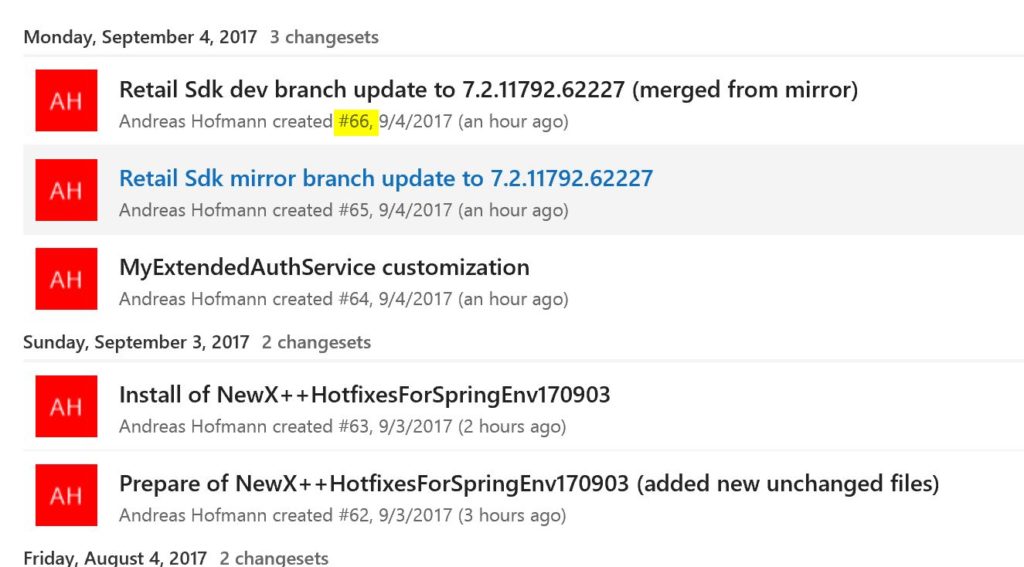
Upload the AX and Retail deployable packages to LCS
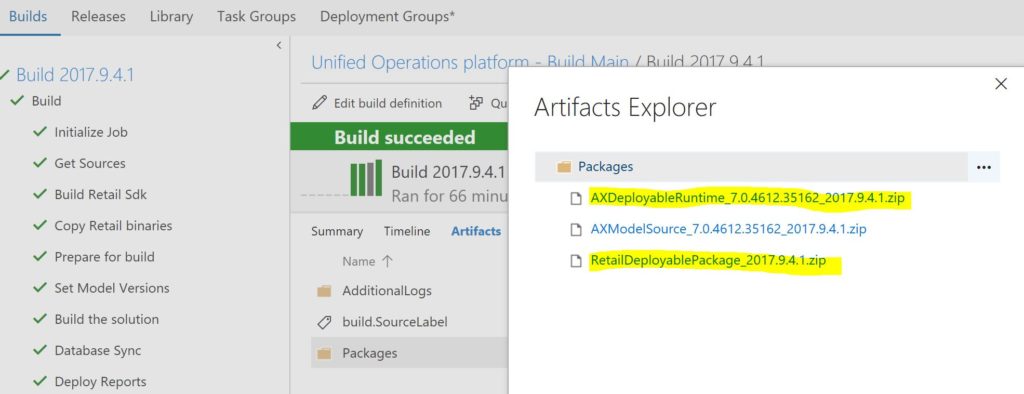
Find the packages in VSTS and upload them to LCS.
Deploy AX and Retail deployable packages
Deploy the packages from the LCS asset library (in the image below the 3rd and 4th). The RetailDeployablePackage is only needed in case of Retail channel customizations.

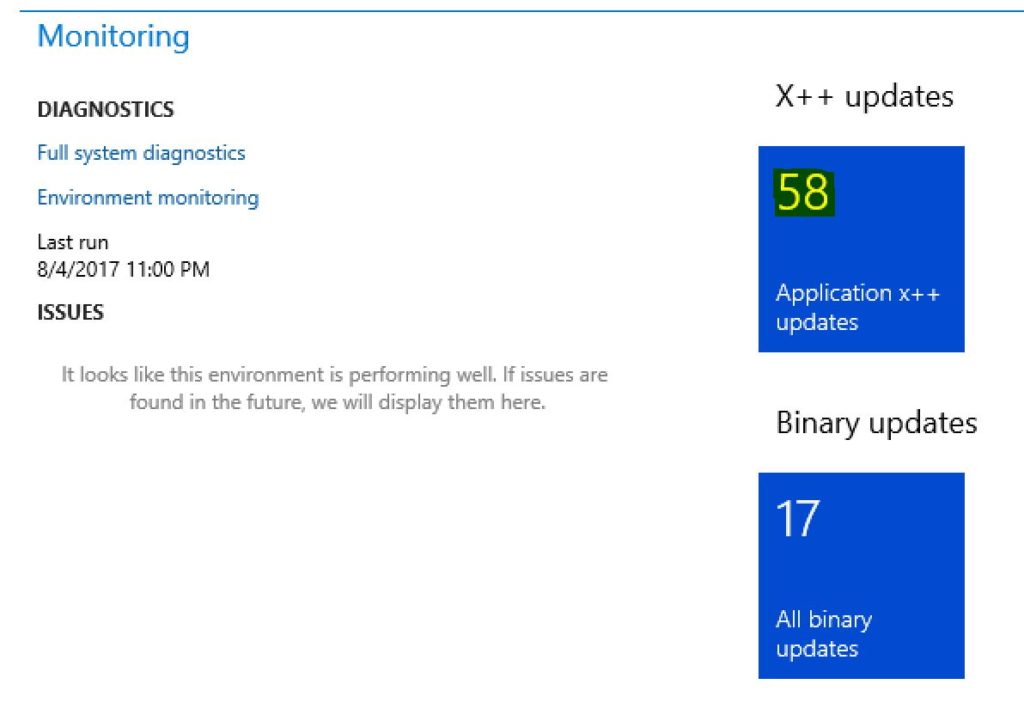
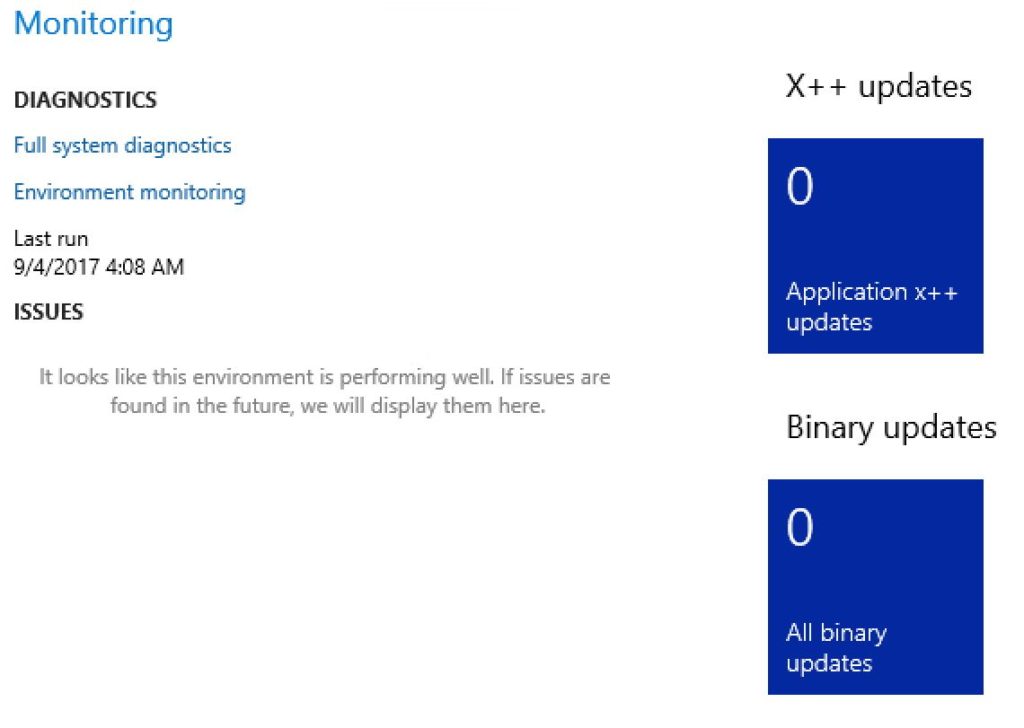
Once the deployment succeeded, you should see the tile count go down.
Retail only: Update channel components
Follow the wiki about how to deploy the store components (Modern POS, Modern POS Offline, Hardware station, Retail Store Scale Unit)
